I have lots of fond memories of LDS Girls Camp (youth camp for our church) growing up. It’s been about 7 years since my last girls camp (as a leader), and I was excited to be going again this summer. I volunteered to do one of the camp crafts this year and to go along with the Press Forward theme, we decided to make DIY wood arrows. Our girls camp theme was The Wizard of Oz, which was also conveniently our New Beginnings theme. Our wood craft day fell on the day that the cowardly lion gained courage, so our arrows say ‘Press Forward with Courage’! They turned out super cute and it was fun to see the creativity of each girl.
The inspiration for these arrows came from this cute instagram post, here’s a link to her etsy shop.
How to Make a DIY Wood Arrow
This post contains affiliate links noted by *.
Materials
- 1 – 1″ x 4″ x 8′ board (actual dimensions 3/4″ x 3 1/2″)
- 1 – 1″ x 3″ x 8′ board (actual dimensions 3/4″ x 2 1/4″-2 1/2″)
- scrapbook paper
- mod podge*
- stain/paint
- foam brushes*
- wood glue*
- 1 1/4″ brad nails*
- vinyl – optional
- scissors
- pencil
- brad nailer (I love my Ryobi Airstrike, I only had to take the nailer and batteries to camp, compressor is in the tool!)
I made about 113 arrows. The wood and nails came out to be $0.84 per arrow. The wood glue is about $4 and that is plenty for all of those arrows.
If you are making a bunch of arrows like I did, here’s how many you can fit on a board.
- 9 feather sets per 8′ board
- 25 arrow heads per 8′ board
- 4 shafts per 8′ board (these can be made shorter or longer depending on your design/wording)

Supplies for 113 arrows (word to the wise, don’t let anyone know that you’re handy 🙂 especially your Mom!)
![]()
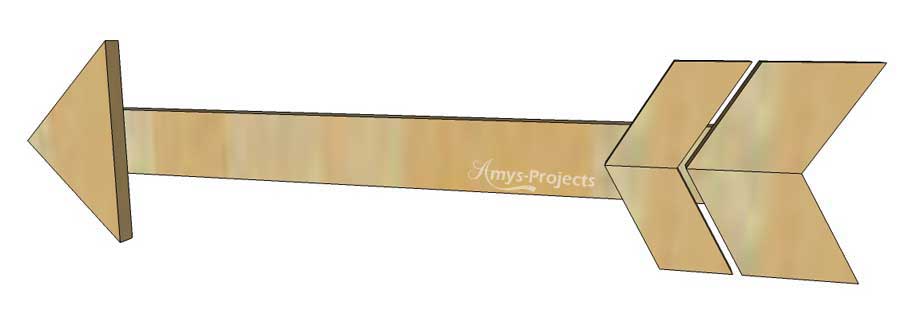
Cut List (per arrow)
- 1 – 3/4″ x 3 1/2″ x 7″ (45 deg miter cuts on each end to make a triangle) – arrow head
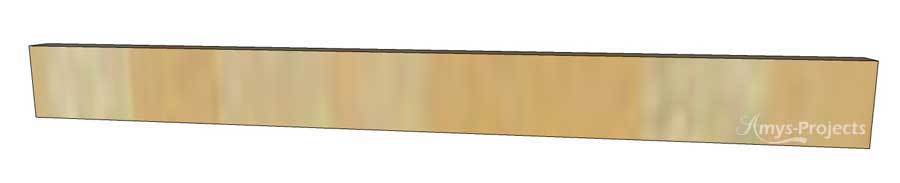
- 1 – 3/4″ x 2 1/2″ x 24″ – arrow shaft
- 2 – 3/4″ x 3″ x 3″ (cut at 30 deg miter) – large feathers
- 2 – 3/4″ x 3″ x 2″ (cut at 30 deg miter) – small feathers
- For the feathers, I ripped down the 3 1/2″ board to 3″ wide before making the miter cuts. I liked the proportion to the arrow head at 3″ instead of 3 1/2″. If you don’t have a way to rip the boards, you can leave them at 3 1/2″ and it should still look fine.
Step 1
Make the arrow cuts according to the cut list. Sand the arrow pieces as necessary.
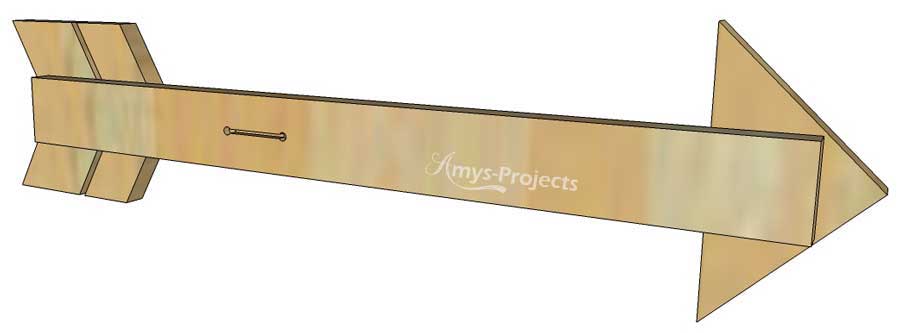
I have a keyhole bit* for my router, this is used to make a slot to hang projects. If you want to, route a keyhole slot in the back of the shaft. To make the arrow hang straight on the wall route the slot 8 1/2″ – 10 1/2″ from one end, this will allow for some leeway.
Step 2 DIY Wood Arrow Assembly
Here is a handy 1 page assembly guide that you can print if you want. Wood Arrow Craft assembly instructions
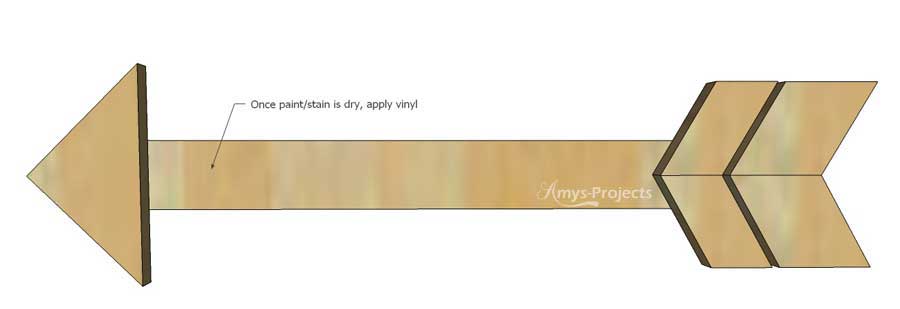
Paint Arrow Shaft
Paint or stain the arrow shaft (tops and edges), set out to dry.
Trace Papers
Get 1 arrow head, 2 large feathers and 2 small feathers. Very Important: Orient the feathers so they will form a chevron. Trace the arrow head and feathers onto the scrapbook paper and cut out just inside the line. (Don’t pre-cut the papers, each piece is slightly different).

Mod Podge Papers
Mod Podge the papers to the arrow head and feathers and set out to dry. Apply a thin coat of mod podge to the backs of the papers and press the papers onto the wood, smoothing out any bubbles. You can also apply mod podge to the tops of the papers to seal the paper.
Final Assembly
Very Important: If you use a keyhole, it needs to be on the backside closest to the feathers!
Use wood glue and 2 brad nails per piece of wood to attach the arrow head and feathers to the shaft.

Apply Vinyl – optional
Line up the vinyl, remove the backing and firmly place it on the arrow shaft. Pull the transfer tape off at a steep angle, making sure the vinyl stays in place.
I begged my sister to cut out a bunch of vinyl for me. The words took up just under 17″ long and 2″ tall. The font is bromello in 115 pt and bold. Here’s the .psd file if you do Photoshop/Elements Press Forward with Courage. You should be able to create something similar with a silhouette* or cricket*.

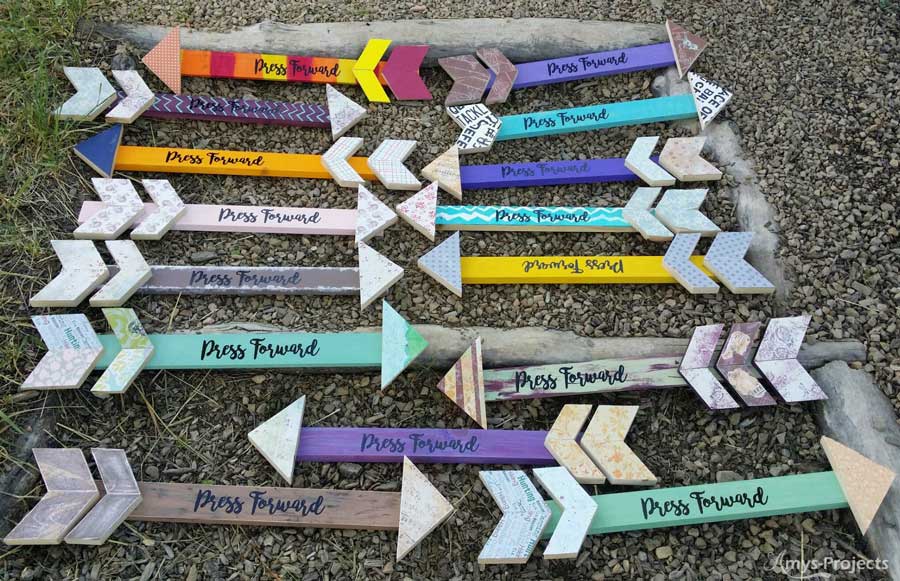
Here are a few of the creations from the Young Women. I didn’t catch them all, there were some really adorable and creative ones.
![]()
![]()
Ignore the back drop props, with 46 arrows, they were drying on everything and anything.
![]()
![]()
This wood arrow craft was definitely a hit!
Here are some of my Mom’s ward young women’s creations, so fun!!! Their camp theme was different, so she had my sister print out ‘press forward’ only.
Thanks for pinning DIY wood arrow!
![]()
Linked to Savvy Southern Style
I’ve always had a soft spot for arrow decor. I love the bright colours you used. Great step-by-step tutorial, too. Love it!
Thank you!
Love what I see, am going to print out this tutorial for hubs to make some arrows for me (at least I hope so). This is awesome tutorial. made an arrow about 3 yrs. ago but not with any paper on it or writing. Did you hand paint writing or use vinyl from cutting machine? Sorry if you addressed that in tutorial which I skimmed at end. Know our daughter wants an arrow as she’s gushed over mine few times. Wonderful project and love saying on arrows.
Happy week
Thanks JaneEllen! The wording is from a vinyl cutter, but you could definitely hand paint it too.
The arrows really look great. I like how you added the phrase and made them so bright and colorful.
Thanks!
Just curios how much each arrow came to I need to stay within a budget. Thanks
The wood and nails came out to be $0.84 per arrow.
These are great? Can you tell me approximately how much you spent on the wood for this project? I see you had enough for 113 arrows, which is close to what I’m looking at too. Just trying to get an idea to see if it is in our budget. Thanks!!!
The wood and nails came out to be $0.84 per arrow.
I have been meaning to comment…I am using your idea at Girls Camp this week! I leave tomorrow for camp! The thing I’m most nervous about with the project is using the nail gun for all the arrows…did you have 1 or more leaders using a nail gun? I only have 1 nail gun at the moment and I’ll have about 20 girls at a time to work with. I’m mostly just hoping that it works and no unexpected problems with it! I’ll have to send you a picture afterwards with our arrows. Thank you SO much for all the info here and detailed instructions. My husband cut all the wood and I cut all the vinyl. Quite a process for 100 girls!
Awesome, have so much fun! Yes 100 arrows is A LOT of work. I ended up setting the girls up in stations and explaining what to do at the beginning. Painting/staining, paper, mod podge, vinyl. I only had one nail gun too. I stayed with the nail gun the whole time, I helped the girls place the arrows then they nailed them, while I held the pieces in place.
Our only trouble was sometimes they trace the paper wrong and not have the feathers mirror.
Good luck and have lots of fun!
Thank you so much for this post. I used this for a YW activity. For our saying it was “Have Courage and Be Kind. It worked out so well. Including the angles and measurements were so helpful. I’m math challenged :).